
Modifying mudguards to fit between caliper brakes
Making it fit for the sake of my butt.
You know what is annoying? Having a stream of dirty cold water directed at your butt soaking the bottom of your pants. That's what riding a bicycle without mudguards over a wet road is like.
My folding bicycle has an lightweight, and airy Vertu Spyder saddle which means the water really hits you everywhere. The 20" wheels also do a great job of slinging the water upwards.
The problem
First I had a mudguard that was mounted at the rear brake bridge, but after the frame was replaced it did not fit there anymore. I then replaced it with one that is mounted to the seatpost. This mudguard is meant for bicycles for 28" wheels, so I thought it should provide more than enough coverage. Unfortunately it was too narrow, too short to provide decent coverage. The way it is mounted around the seat post makes it very prone to shifting out of position, providing even less functionality.

The solution
I thought about modifying the mudguard by adding stuff to it to improve the coverage, but it would not look very good. Replacing it with a similarly but larger mudguard would probably still have problems with sliding our of place.
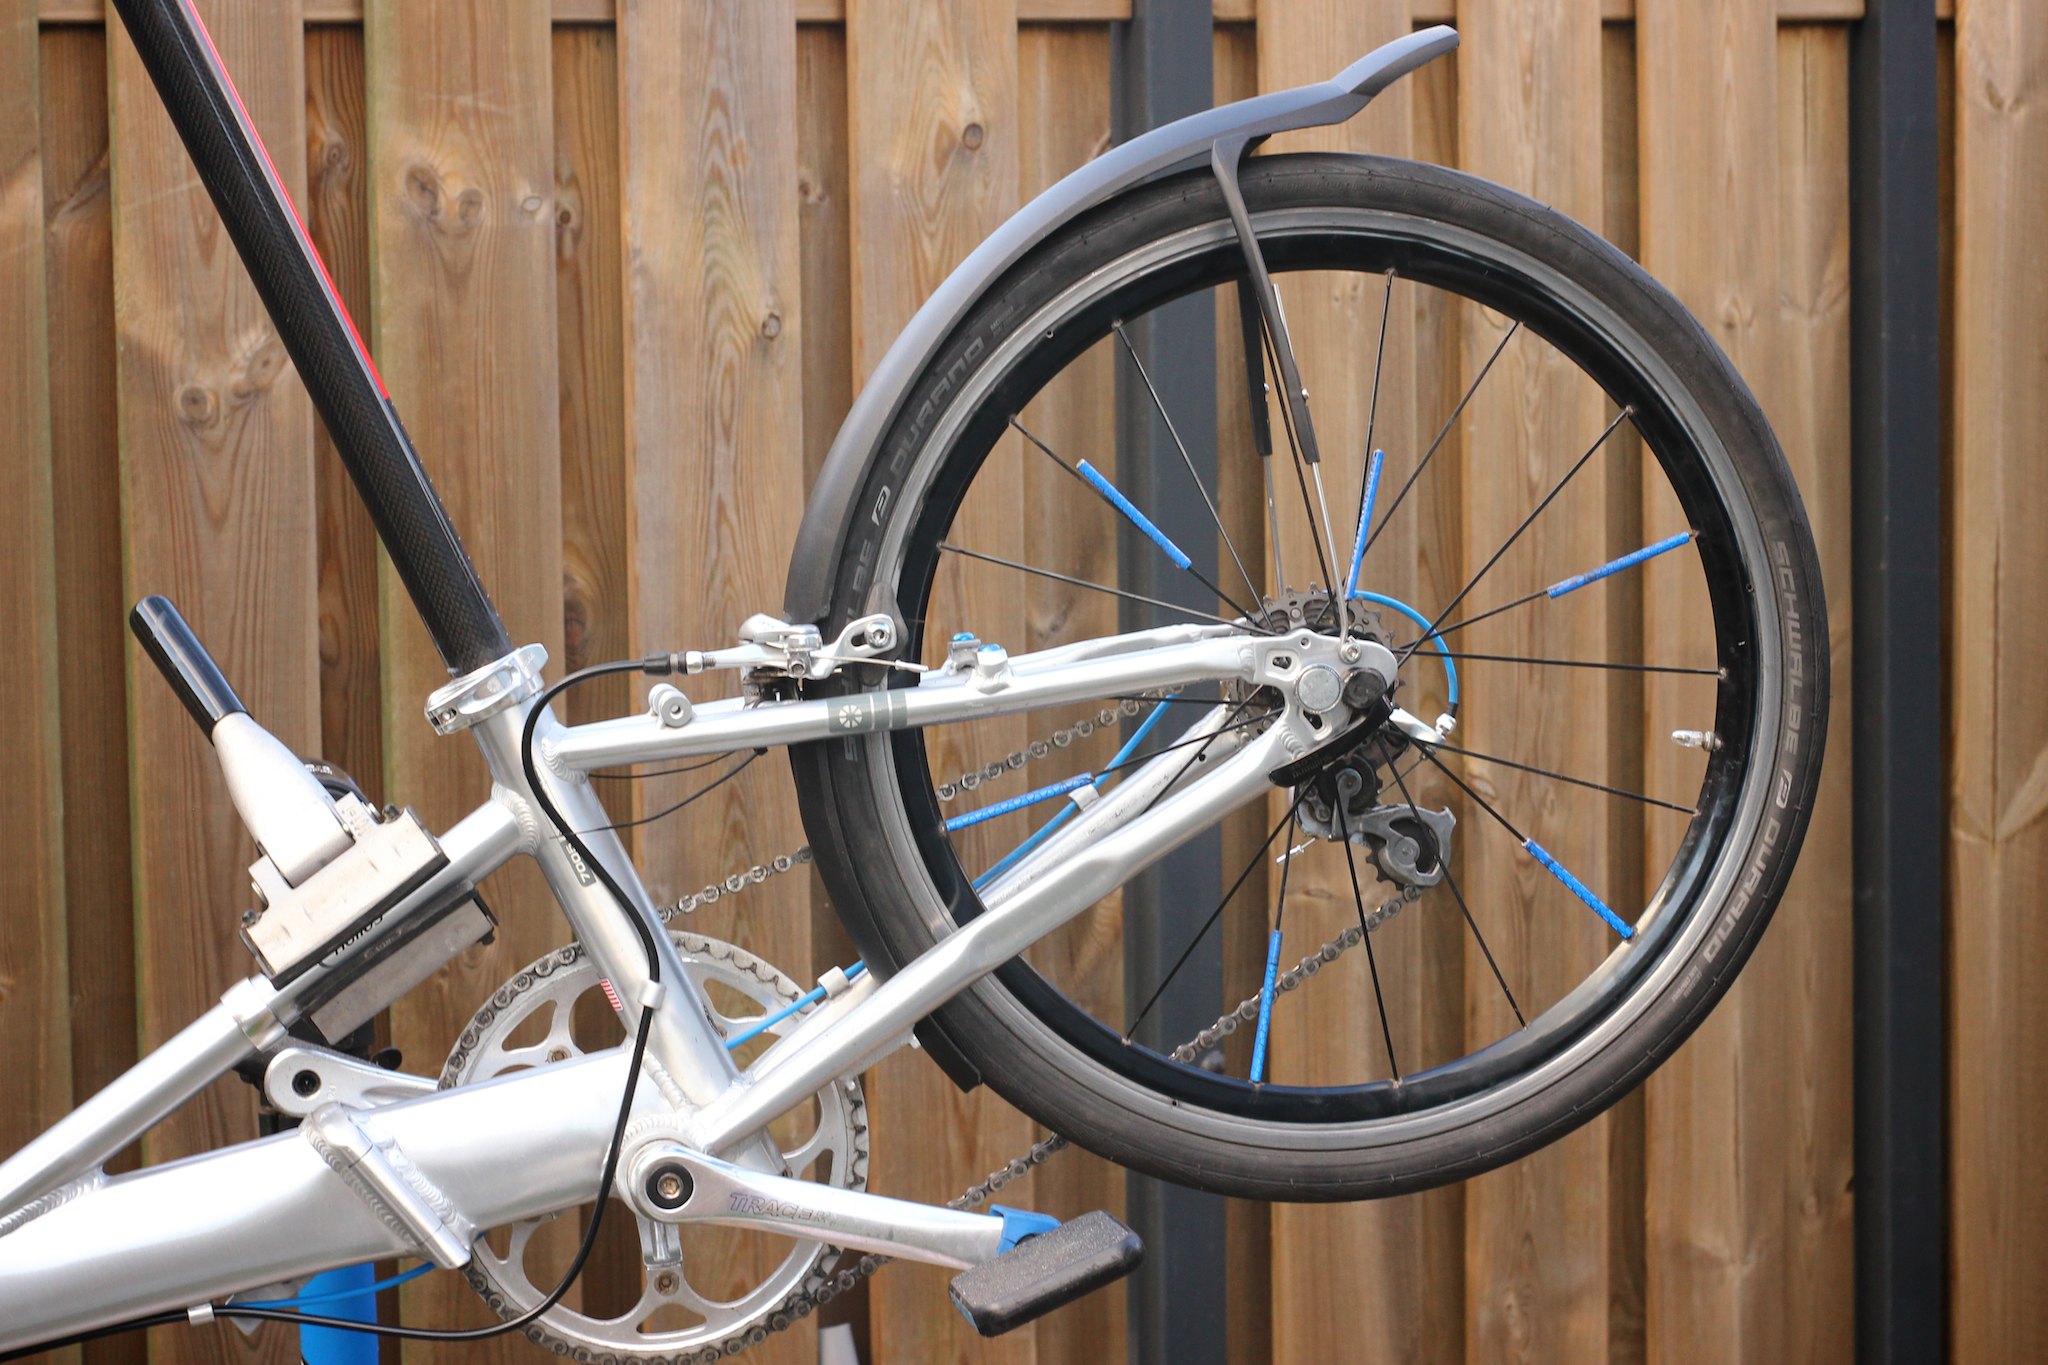
The only right way of doing this was to go all the way with full length mudguards, made for this wheel size. 20" mudguards are not so common, eventually I ended up with the Hebie Taipan 20 mudguards, meant for bicycles fr children, but also fit most folding bicycles.
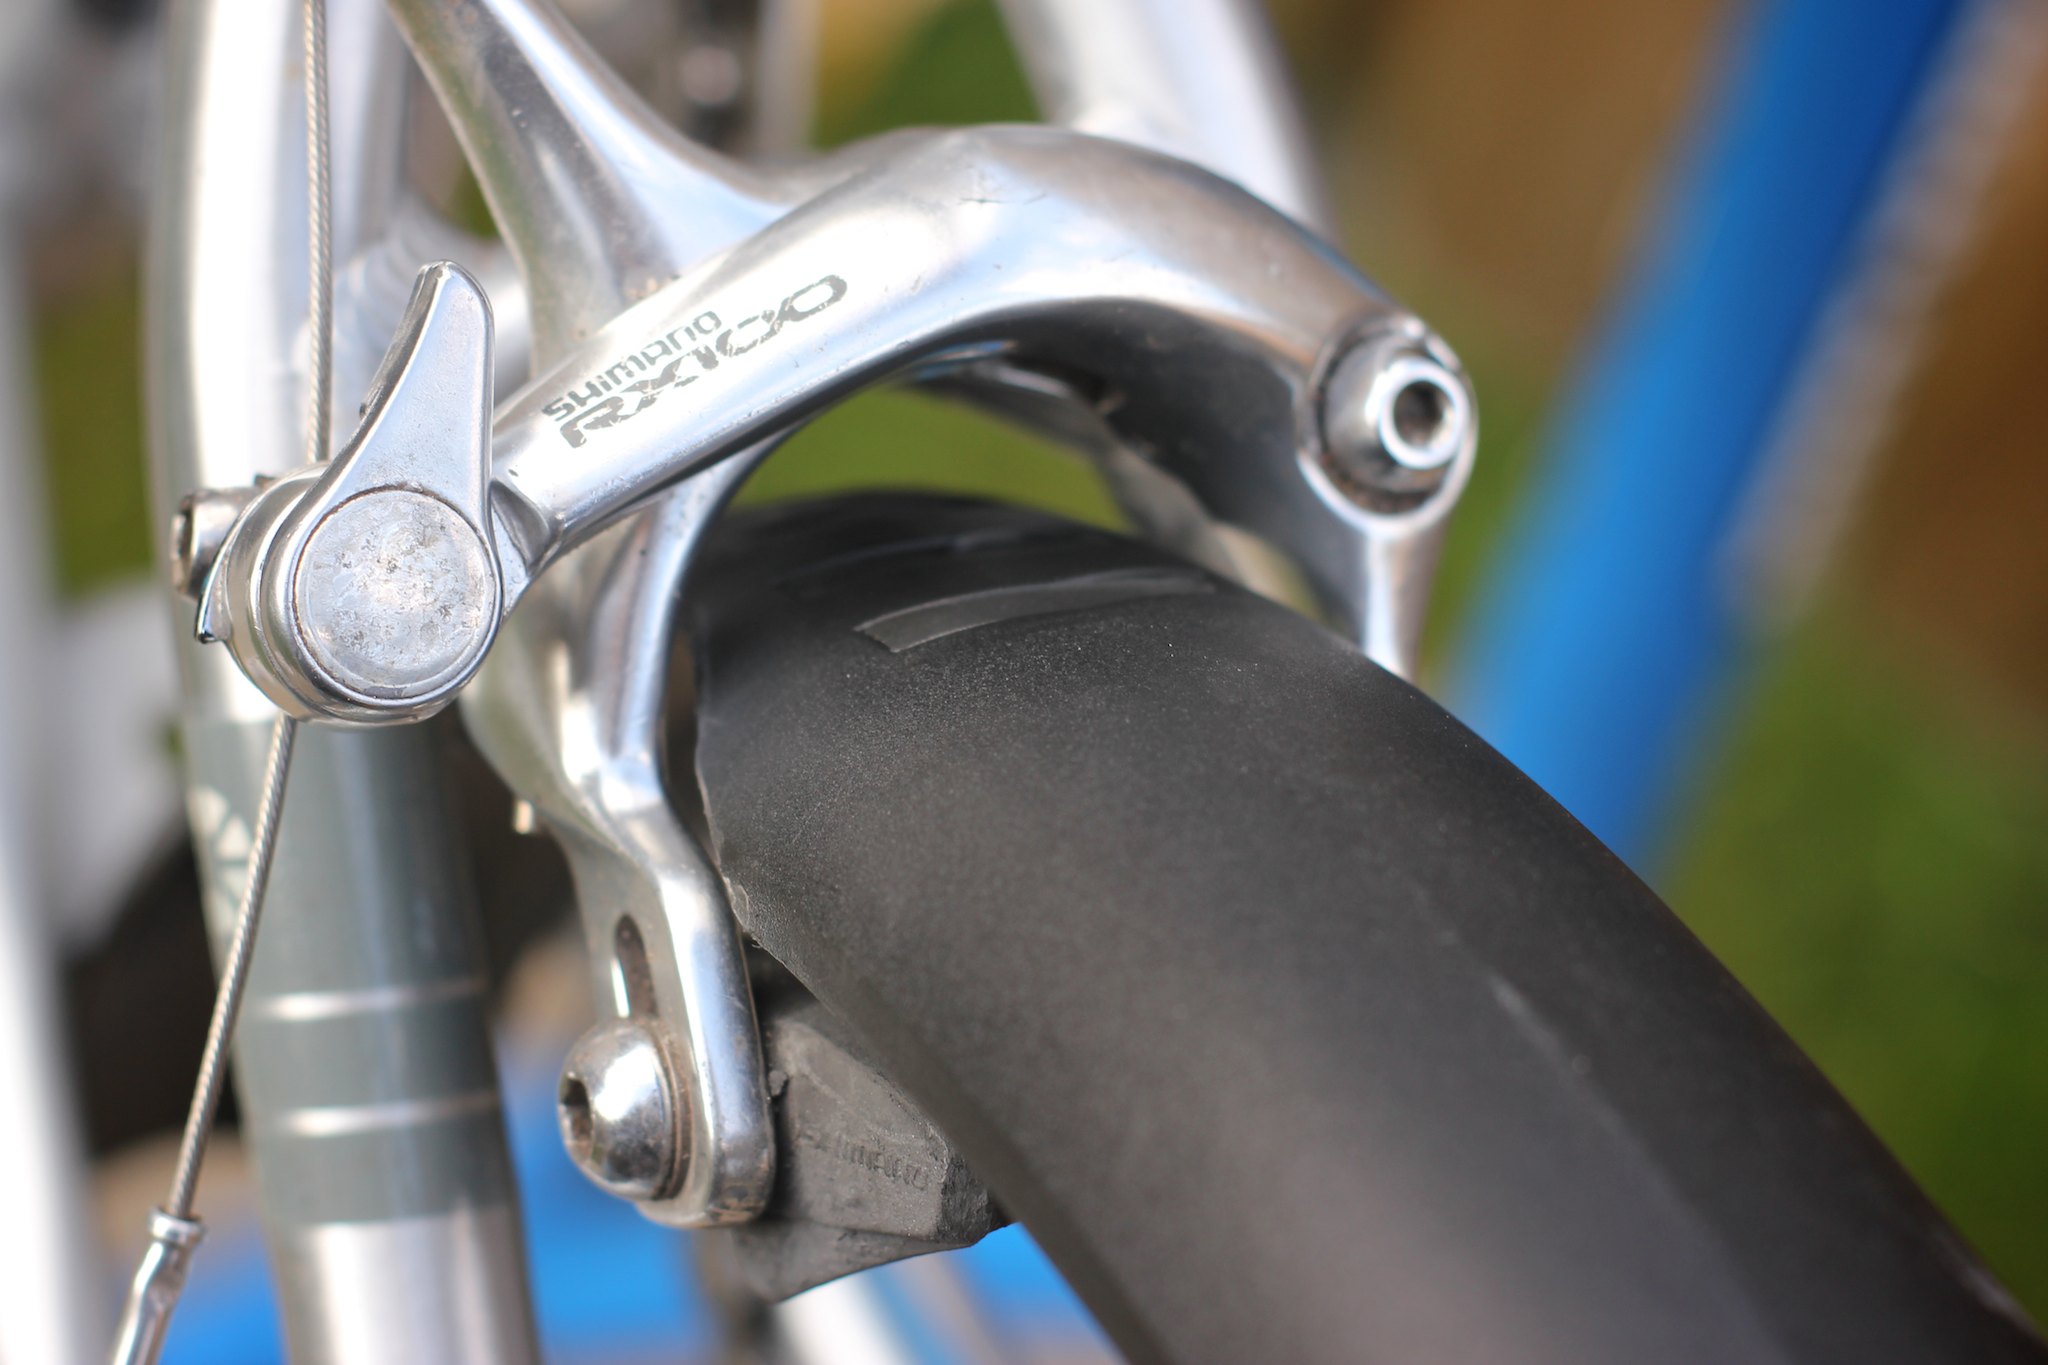
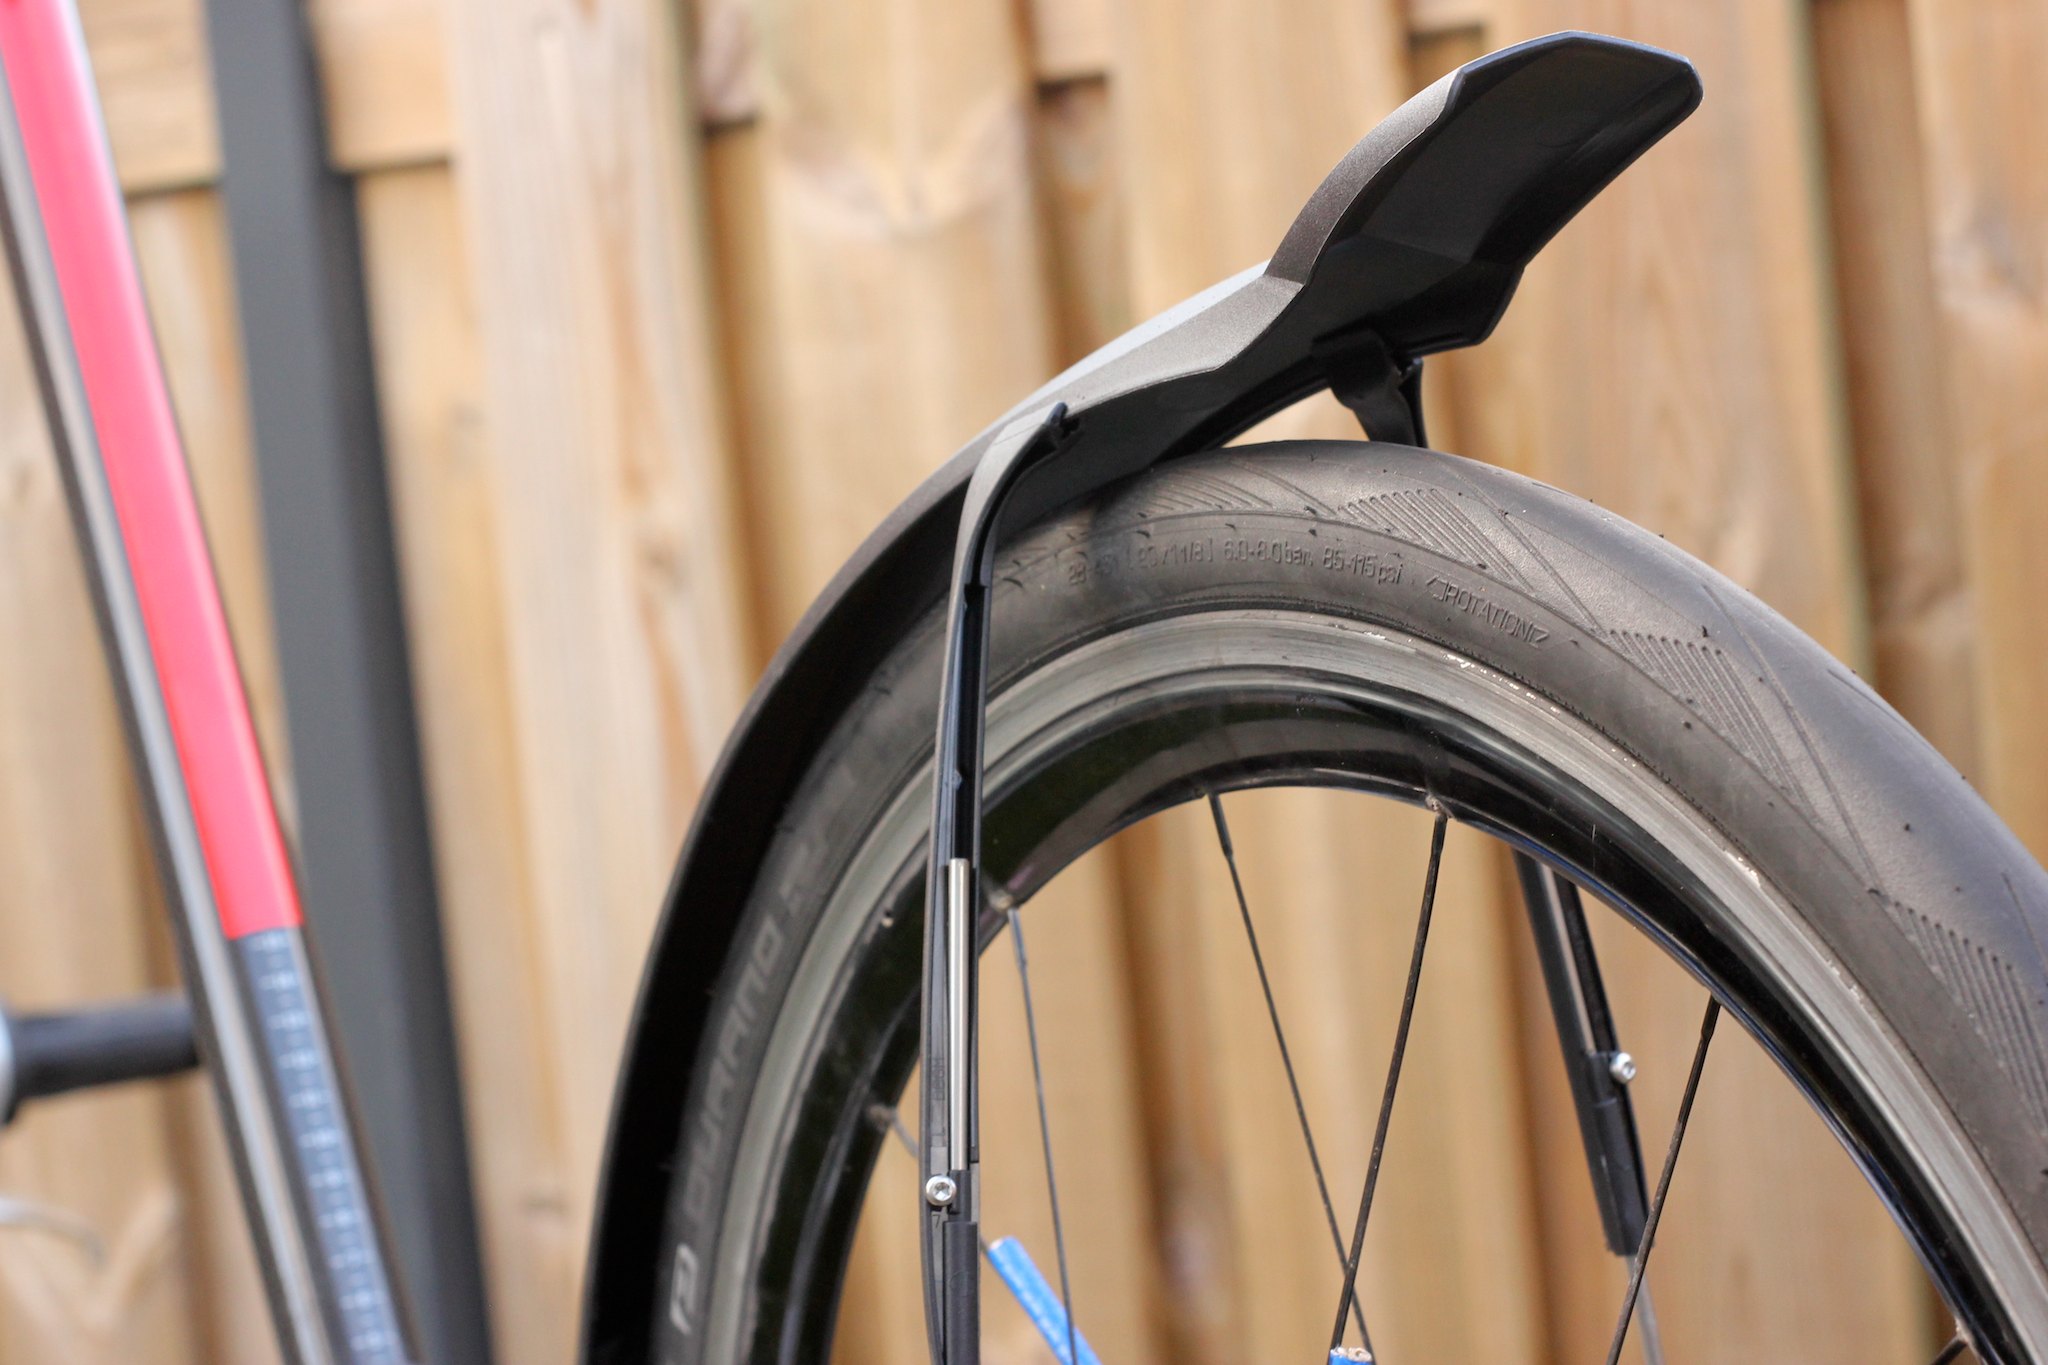
The mudguards are 50 mm wide, which is more than enough for my my 28 mm wide tires. Most folding bicycles use V-brakes, which would fit around the mudguard without problem. My caliper brakes don't fit. Instead of replacing the brakes I modified the mudguard to make it fit.
Cutting mudguards to size
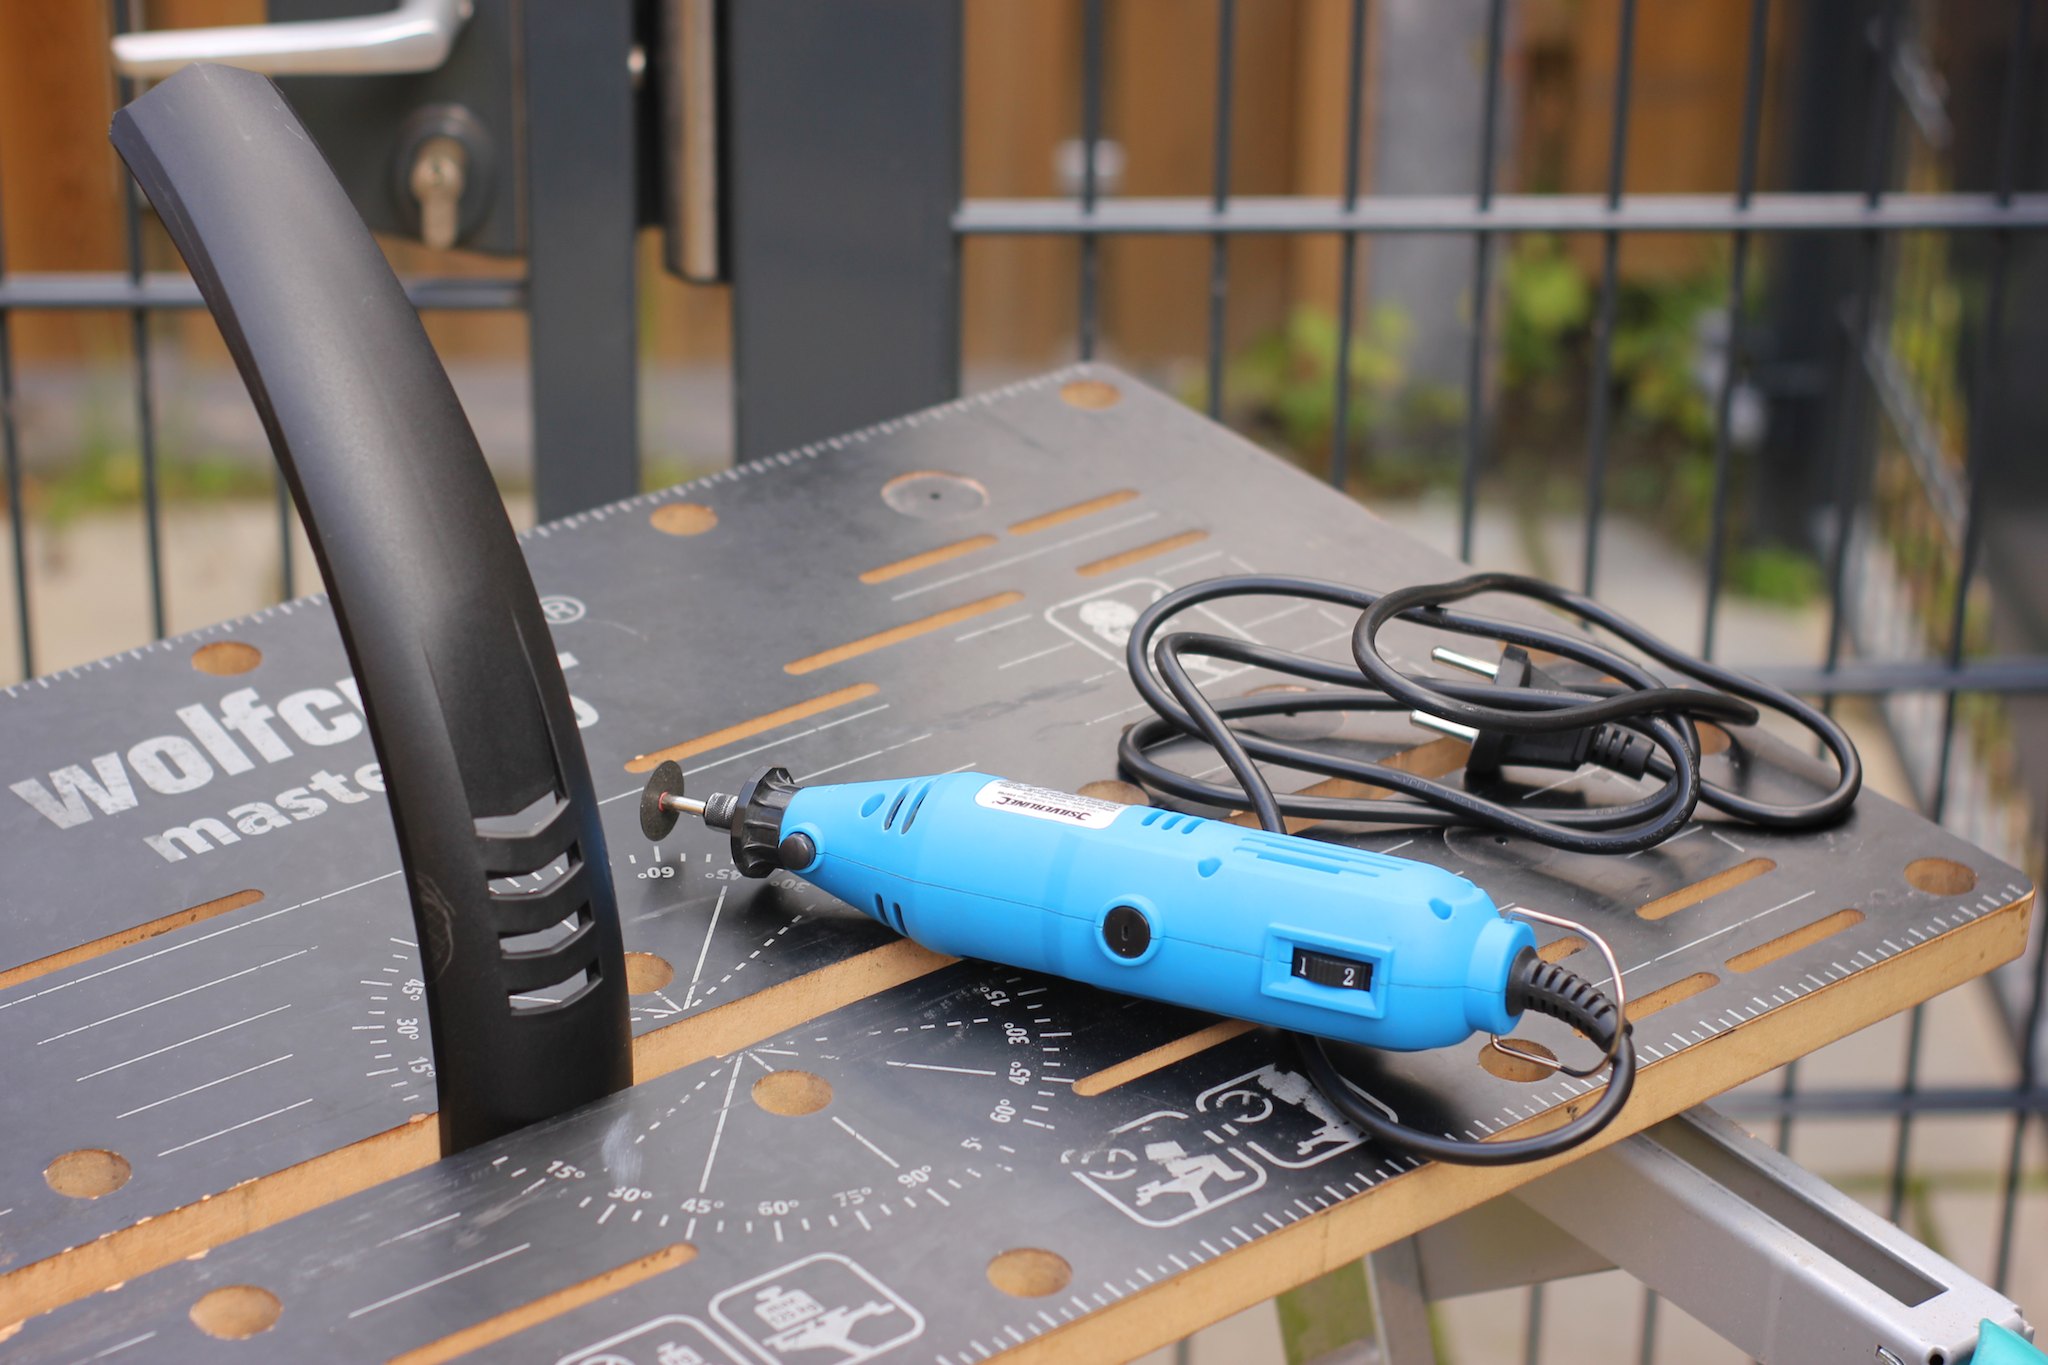
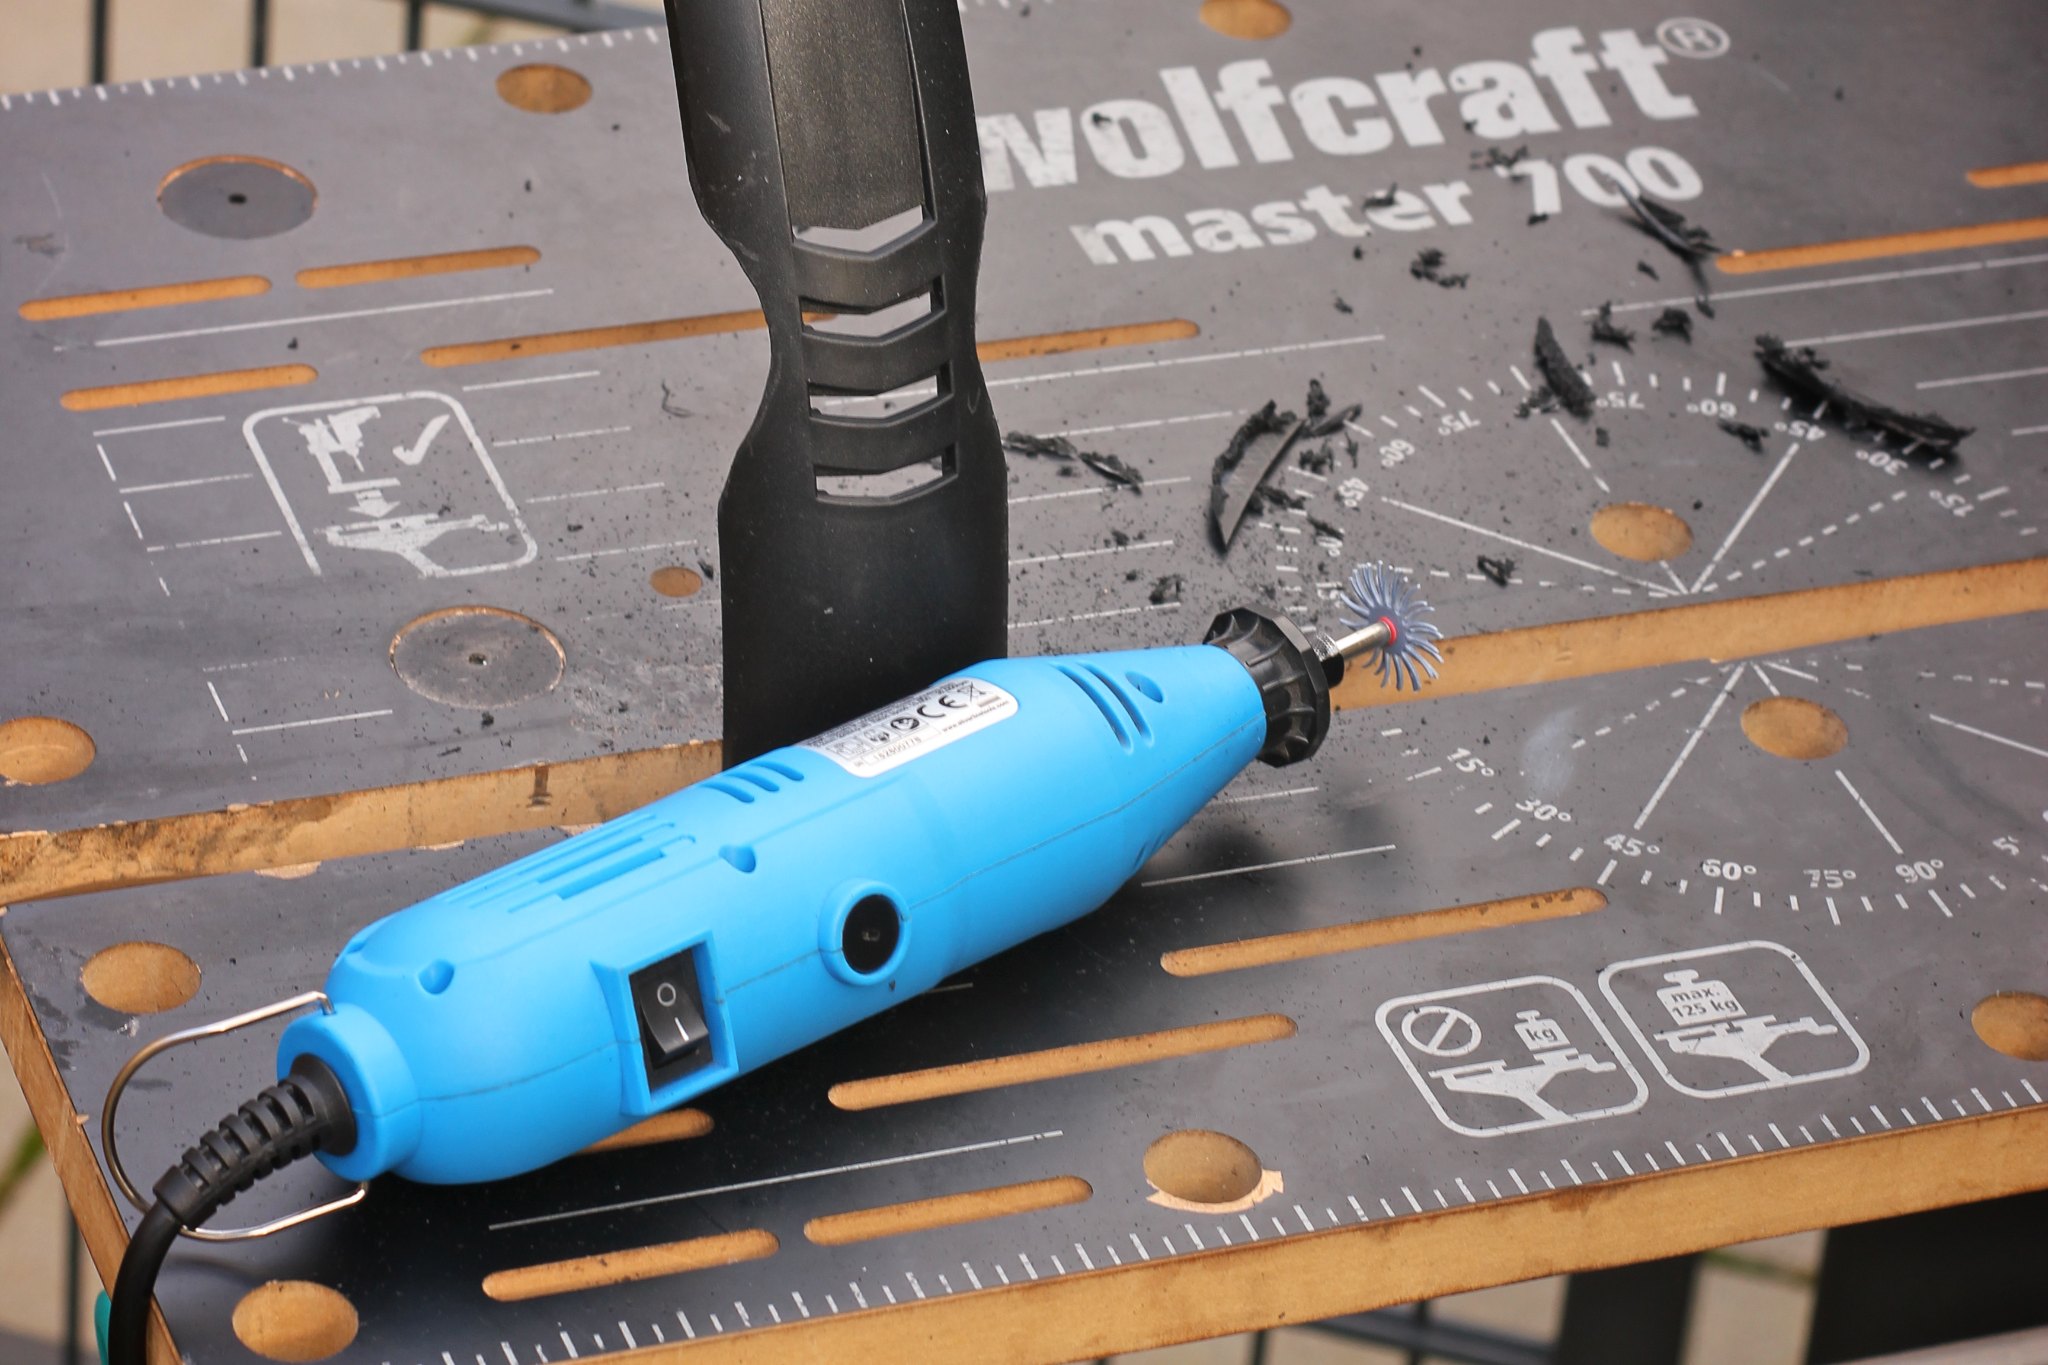
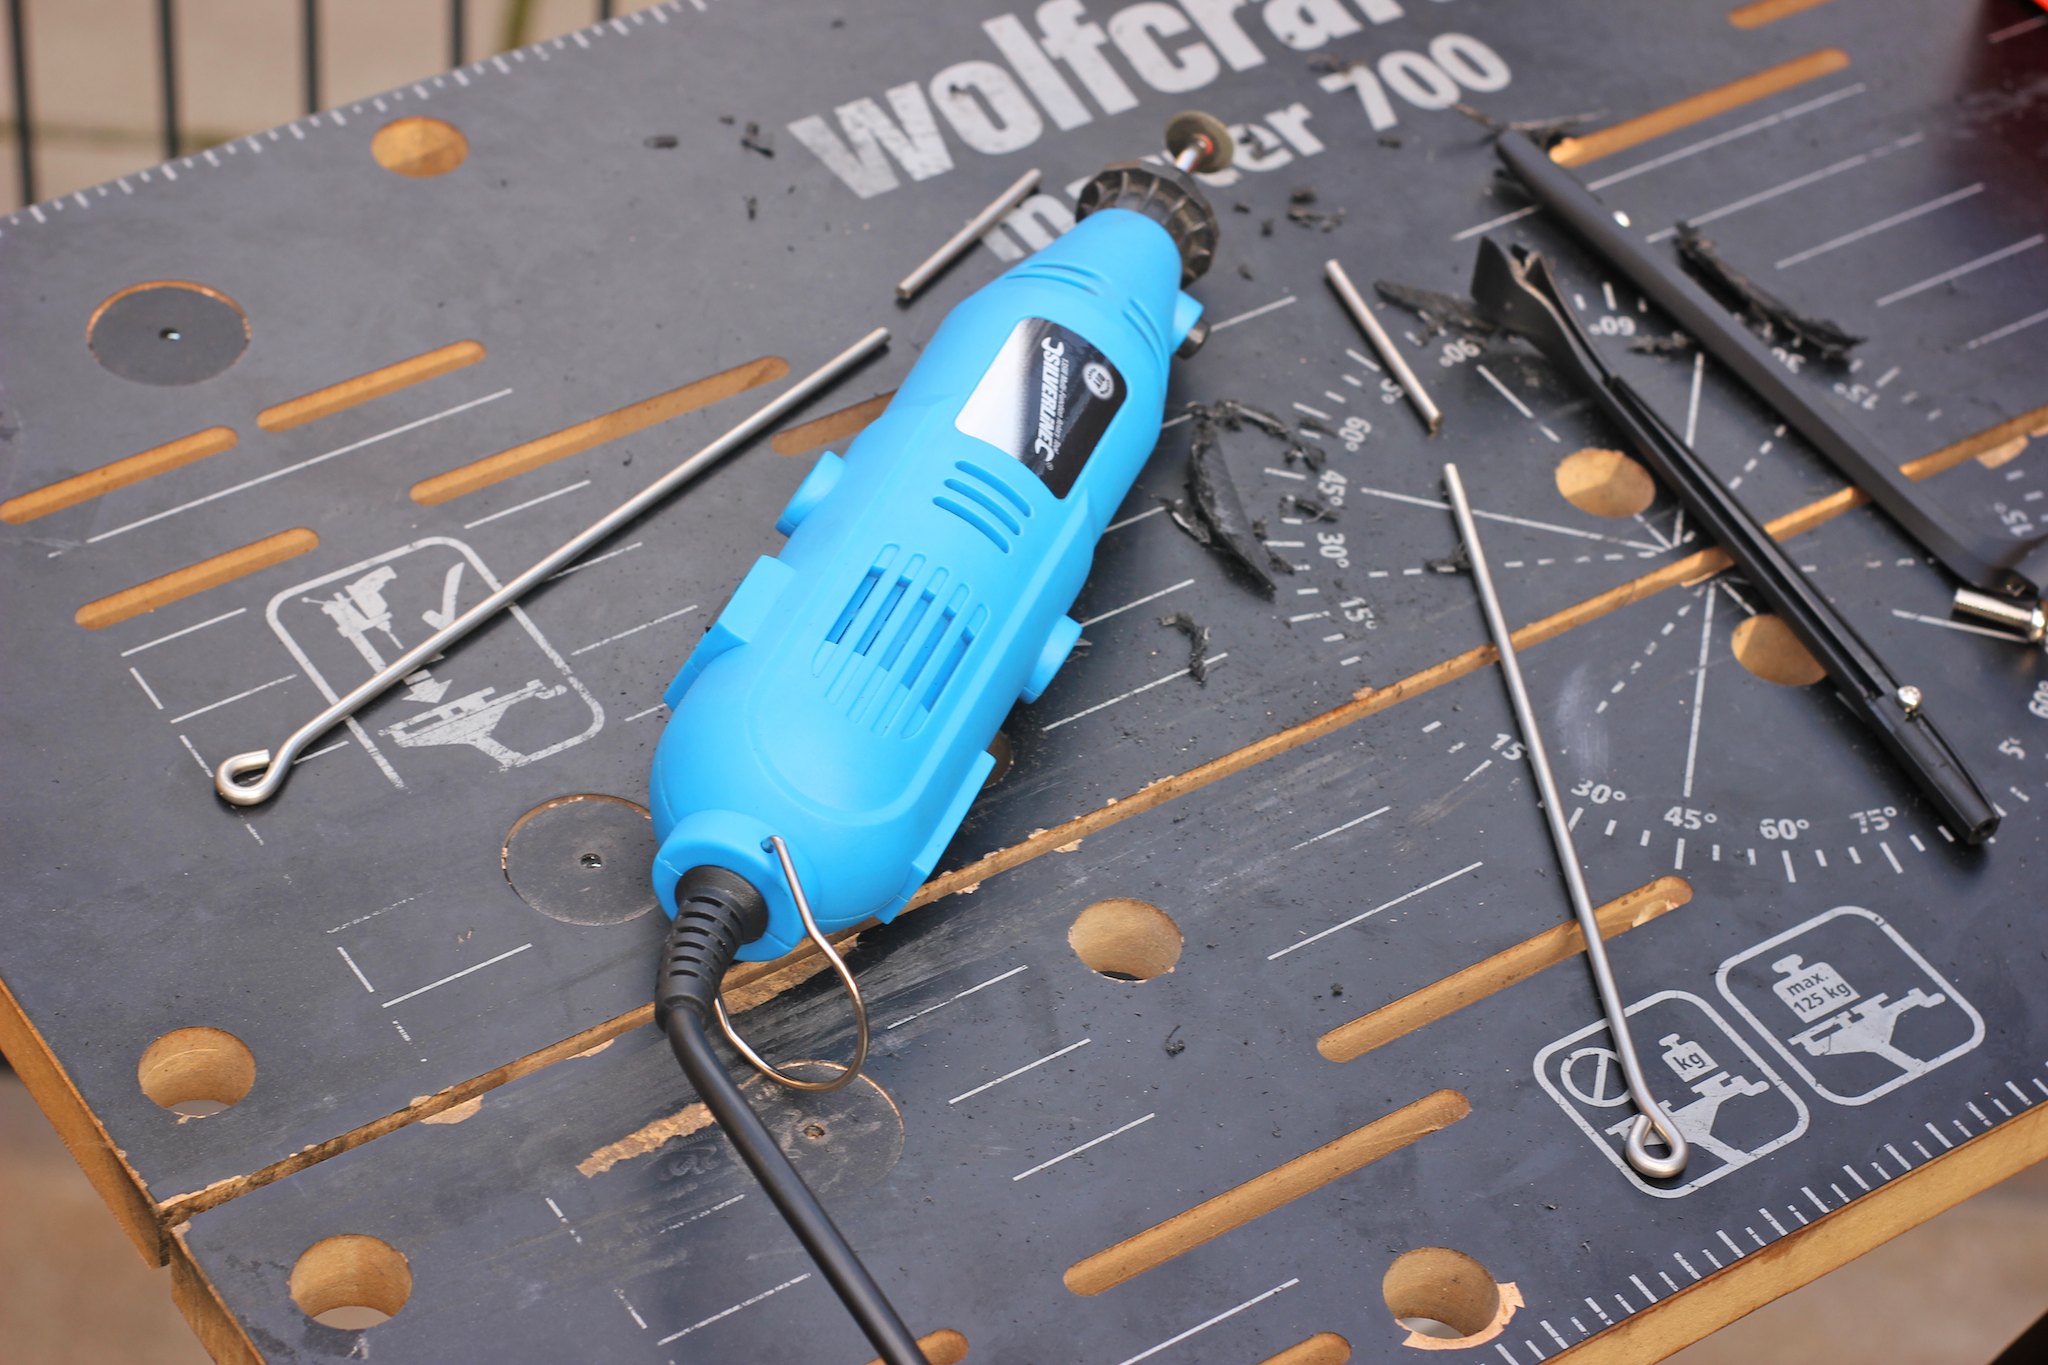
After eyeing the approximate spot of where the mudguards need to be trimmed I marked it with a pencil. I then used a rotary multitool with a 20 mm grinding disc to cut away the plastic. These mudguards don't have any fancy layering of materials, just plastic all the way through. After that I used a stone wheel and eventually a nylon wheel to smoothen the edges. I did this about three times because every time it turned out I needed to remove more material than I thought.
After putting in the wheel it was not turning at all; the tire was rubbing the mudguard, which was being pushed down by the caliper brake. The problem with this mudguard is that it is extra thick around the brake caliper because it is supposed to be mounted there. I used a strip belt sander (also known as electric file) with grit 40 to remove some of the plastic on the inside, and trim the edges some more. After a few more attempts I was able to make it fit.
The wheel was mostly spinning freely, but the mudguard was still being pushed down a bit by the brake caliper. I used some tie wraps around the brake bridge, through the mounting holes of the mudguard to secure it away from the tire. This method does not impede tire clearance any further.
To cover up the holes in the mudguard I used two packets of Sugru. I applied it a bit to early, as I found out that the wheel didn't have enough clearance and had to do more grinding, but fortunately the Sugru remained malleable enough work width.

To mount the mudguard on the bottom I drilled a hole through the plastic. First put in an M5 bolt with a hex shaped head, as it is flatter than using a bolt for an Hex key. After putting in the wheel, it turns out there was very little clearance, so I replaced it with a bolt with a flat square head which I screwed in using an adjustable wrench. I then put a locknut on the other side to prevent it from coming loose.
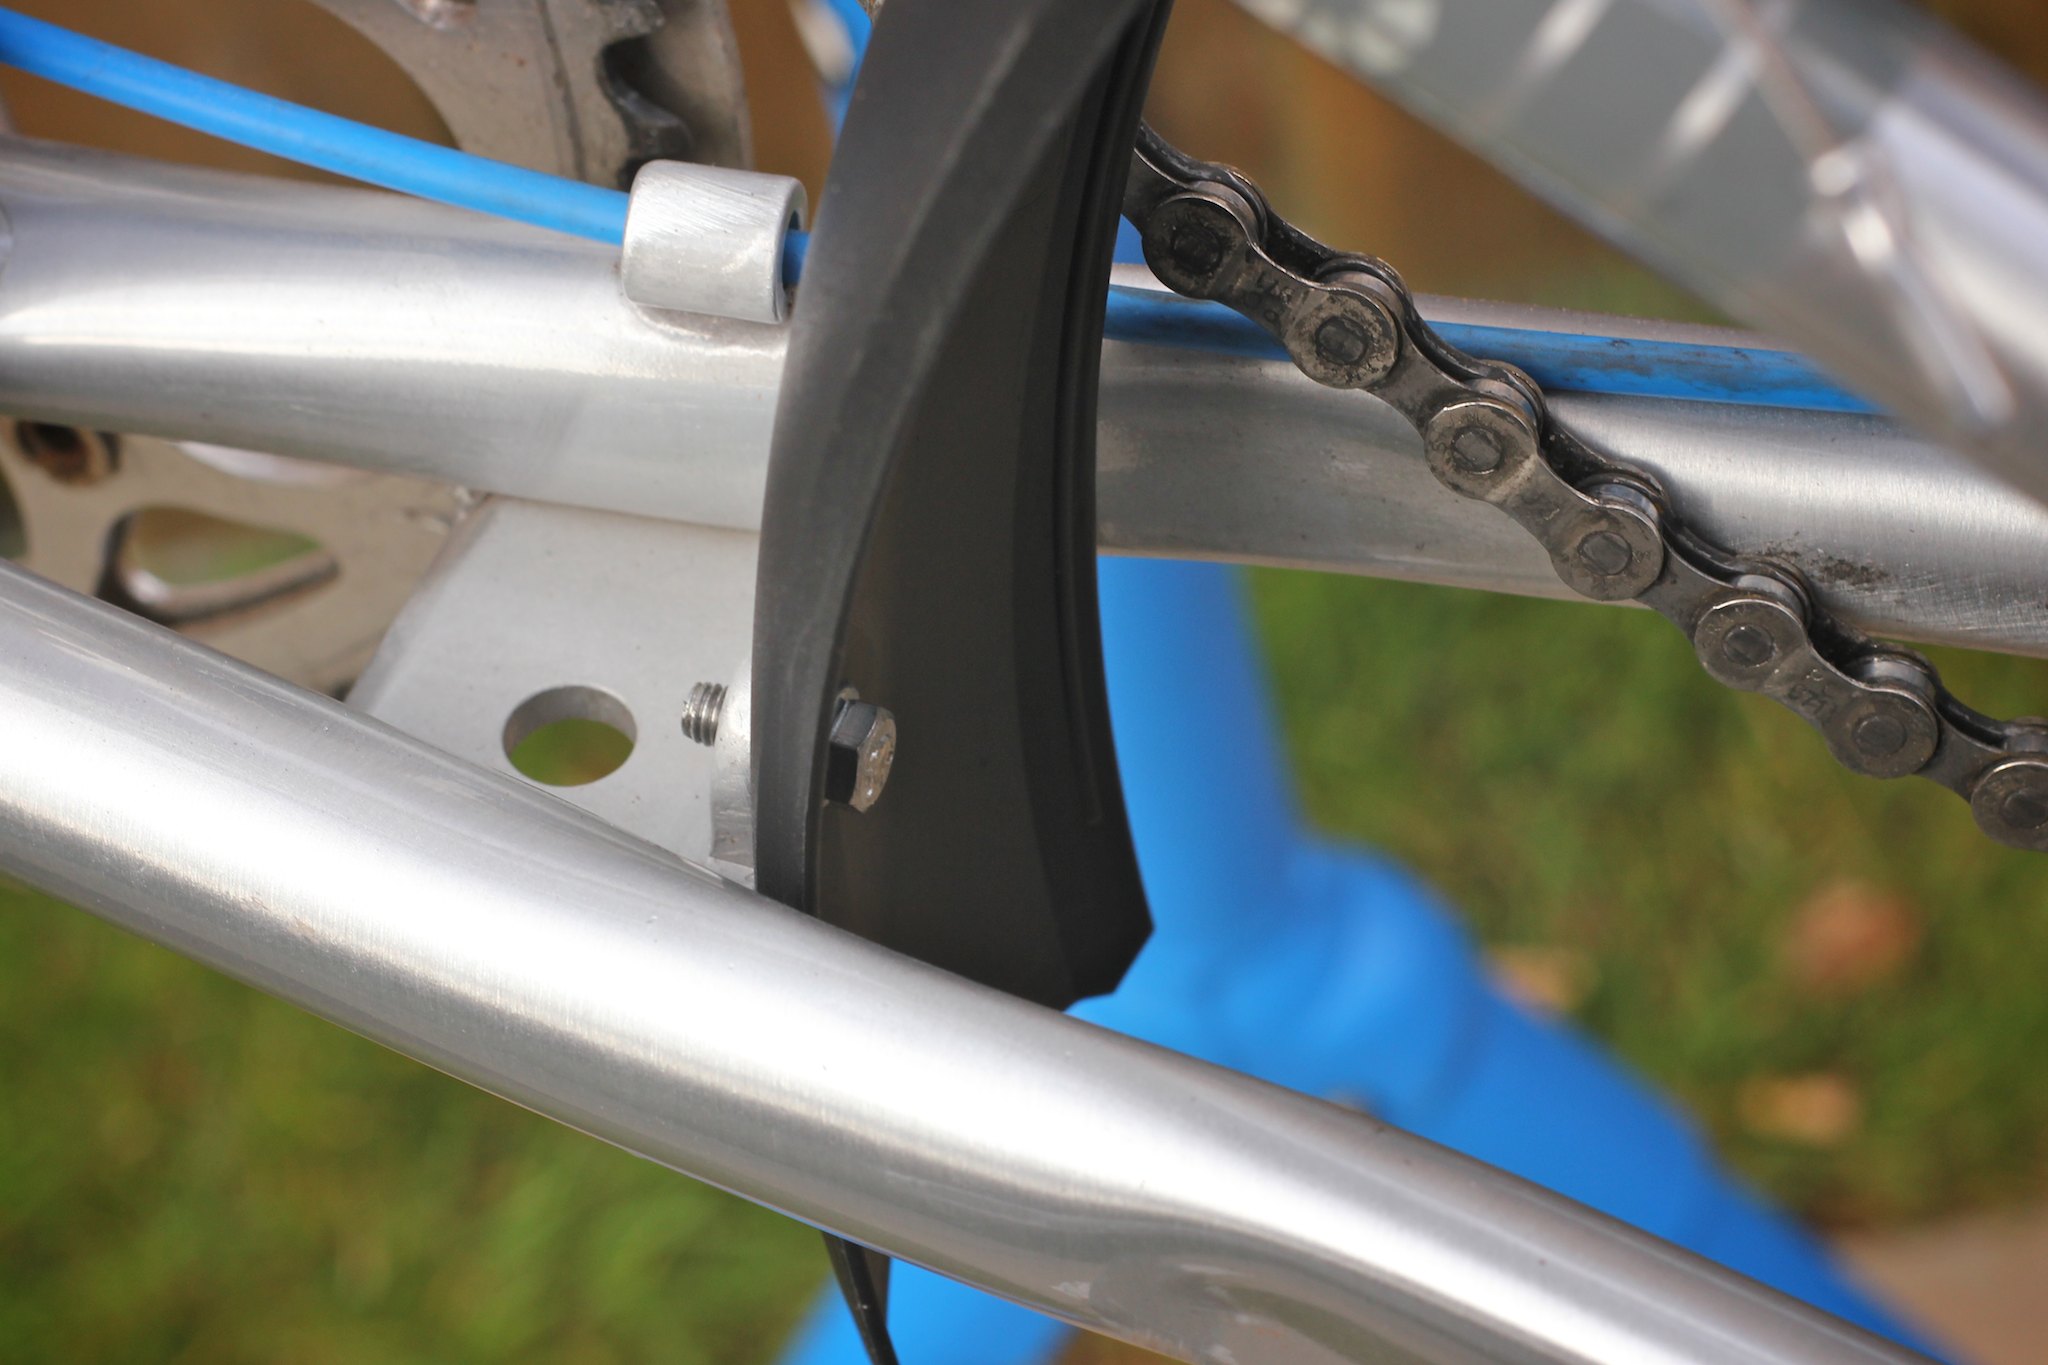


The mudguards do not come with support struts, but Hebie sells some that fit separately. Fortunately, I still had an unused pair laying around from the Hebie Viper Stadtmeister mudguards. They clipped right in, only problem is that they were a bit long for my folding bicycle. Using the cutting disc on my multi tool I cut about 7 centimeters off each one. The metal is quite hard, it wore down the cutting disc quite a bit.
Finally done!
Doing custom work always takes more time than you think. In this case I had to adjust my cut several times, and then solve the problem with the wheel rubbing. I also should not have applied the Sugru before I was completely done, but I didn't want to bother having to take the wheel out again. I ended up taking out the wheel several times anyway.
If this was a professional job it would have been quite an expensive one, replacing the caliper brake with a V-brake would have been much faster. Nevertheless it was good that I was able to use parts that I still had laying around.
I hope that this mudguard will be the last one I need for this bicycle and keep my butt dry during wet commutes.
Tools used
- Rotary multi tool
- Strip belt sander
- Adjustable wrench
- Hex keys
- Sugru